As an Amazon Associate, we earn from qualifying purchases. Some links on this site are affiliate links at no extra cost to you. Our recommendations are based on thorough research and editorial judgment.
How To Use Dry Bags In Backpacks?
Using dry bags in our backpacks is a smart way to keep gear dry and organized. First, we choose the right size—small for essentials and larger for bigger items. Next, pack heavier items close to our back for stability. Roll the bag three times to seal it and check the waterproof seal before heading out. Attaching dry bags to the outside of our packs adds convenience. As an added bonus, they also have other uses we can explore together!
Key Takeaways
- Use small dry bags for quick-access essentials like snacks, keys, or first aid kits in your backpack.
- Pack medium dry bags for items like clothing or sleeping bags to maintain organization during day trips.
- Position heavy dry bags near your back for better weight distribution and stability while hiking.
- Utilize compression straps on your backpack to securely tighten dry bags, reducing movement and strain on your shoulders.
- Always check seals and zippers on dry bags before use to prevent water damage to your gear.
Understanding the Different Sizes of Dry Bags
When we’re gearing up for an adventure, understanding the different sizes of dry bags is key to keeping our stuff safe and organized. Let’s consider our size selection carefully. Small bags (2 to 5 liters) are perfect for essentials like keys and snacks, giving us quick access. Medium bags (5 to 15 liters) are our go-tos for day trips, holding gear like cameras or sleeping bags without feeling bulky. For longer trips, larger bags (16 to 50 liters) help us pack efficiently but can be heavy and cumbersome. We can even use extra-large bags (50 liters and up) for group outings, though they’re not ideal for everyday backpacks. By choosing wisely, we enhance our packing efficiency and make every adventure a breeze! Additionally, keeping clean water storage in mind can further ensure we have essential hydration available on our journeys.
Recommended Products

【SUPERIOR STABILITY】The two-chamber design provides a wide base and recessed deck for a lower center of gravity, keeping both paddler and gear high and dry.

VOLUME: 18.4 L total—13.4 L upper compartment, 5 L lower compartment (holds 6 cans)

Super LARGER Paddle Boards: 11'6"x35" longer and wider golden ratio design with a capacity up to 450lbs, ensures more stability and safety, more space to share fun with friends, kids or pets. Ultralight and durable paddleboard is designed for comfort and provides long-term corrosion and abrasion resistance. Soft and non-slip EVA deck greatly improves balance, suitable for all skill levels especially for beginners.
Choosing the Right Material for Durability
Choosing the right material for our dry bags is essential if we want to keep our gear safe and dry during our adventures. When we look at fabric comparison, nylon stands out—it’s strong, tear-resistant, and naturally water-resistant, although it needs coatings for full waterproofing.
We should also consider the denier rating; a higher number indicates a heavier, more durable fabric. For those of us tackling harsh terrains, options like TPU-coated nylon offer a great balance of strength and sustainability compared to PVC. Finally, let’s not overlook seams! Welded seams are often better than adhesive ones for long-term durability. Additionally, investing in high-quality materials ensures that our dry bags can withstand the rigors of outdoor activities without compromising on performance.
In our durability assessment, the right materials guarantee our gear stays protected, allowing us to fully enjoy our escapades, rain or shine!
Recommended Products

The Rev Rack Tent is a heavy-duty, 4-season, 2 person Roof Top Tent with a built-in mattress that weighs only 25 lbs / 11 kgs and includes hardware to mount directly to platform-style roof racks 48” x 84” / 1220mm x 2134mm or larger

Spacious Luxury Inflatable Tent: With 144 sq ft of comfortable living space, it's like a mini apartment outdoors. Includes an extra rain cover for dual protection, good for year-round travel Thick fabric can be used with a stove in winter to maintain a comfortable temperature

PREMIUM BUG OUT BAG FOR 2: Developed with first responders, this 72-hour survival kit includes over 60 essentials to help you stay prepared during blackouts, earthquakes, hurricanes, and other real-world emergencies.
Utilizing Insulated Dry Bags for Cold Weather

Utilizing insulated dry bags for cold weather can truly elevate our outdoor adventures. These bags offer insulated advantages that help keep our food and drinks cold for hours—or even days—thanks to high-tech materials. When packing, let’s embrace a layering strategy: place frequently accessed items like gloves at the top, while keeping electronics in the middle for maximum protection.
Remember to seal the bags properly, and if they have air valves, let’s use those to maintain heat. Using smaller bags inside the insulated one can organize our gear. And hey, don’t forget silica gel packs to absorb any moisture! Additionally, having a reliable water purification system is essential for ensuring safe hydration during extended trips. With insulated dry bags, we can enjoy our winter outings, knowing our essentials are well protected against the elements.
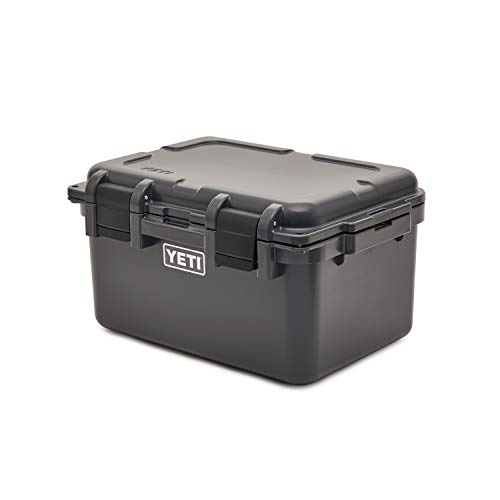
Recommended Products

The Haul is the first-ever YETI cooler on wheels. Perfect for taking the Tundra's legendary toughness and unmatched insulation power the extra mile

5 1/4IN Spacing/Continuous Baffles

15-degree Fahrenheit (-9-degree Celsius) ultralight down sleeping bag for 2-season backpacking, bike packing, and touring
Packing Techniques for Effective Weight Distribution
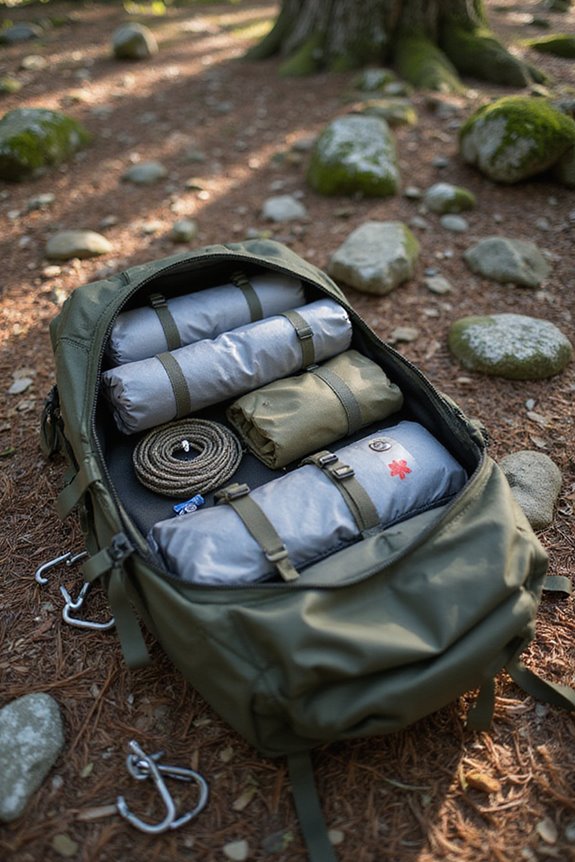
Packing a backpack isn’t just about shoving everything inside; it’s all about effective weight distribution. To make our hiking experience smoother, we’ll want our heaviest items near our back, around the shoulder blades. This keeps our center of gravity low and stable. Strategic packing techniques suggest that we position weight vertically, filling gaps with softer items like clothes for balance.
Let’s use dry bags to keep our heavier gear centralized, maximizing compactness and preventing shifts. We can layer lighter items at the top and in outer pockets for quick access. With all this in mind, we can tighten our compression straps to keep everything snug. A well-packed bag means less strain on our shoulders and more fun on the trail! Additionally, utilizing waterproof construction materials in your dry bags will ensure that your gear remains safe and dry during unpredictable weather conditions.
Organizing Gear With Internal Compartments
When we hit the trails, organizing our gear with internal compartments can make our hikes way smoother. Think about those mesh pockets and elastic slots—we can stow small items neatly and keep them accessible. Using organizers designed for dry bags, like those Faraday inserts, helps us separate gear effortlessly. It’s smart to dedicate different compartments for food, clothing, and tech gear. Let’s keep our frequently used items near the top for quick access. If we’re feeling fancy, color-coded dry bags can brighten our pack and speed up our gear organization. Additionally, using lightweight cookware sets can also help maintain an organized pack by preventing bulky items from cluttering your gear. With effective internal design, we can minimize rummaging and keep our hikes stress-free. So, let’s embrace the art of packing—our adventure awaits!
Securing the Dry Bag With Roll-Top Closures
Securing your dry bag with a roll-top closure can feel a bit tricky at first, but once we get the hang of it, it becomes second nature. First, let’s leave about one-third of the bag empty. This space helps us roll the top properly, avoiding common mistakes like overfilling.
Next, we roll the top down at least three times, ensuring no air is trapped inside. Each roll should be tight and snug—think firm, not hasty. As we fasten the buckles, we’ll double-check that they’re secure without gaps. Finally, regular inspections help keep the closure clean and intact. Remember, when we apply these sealing techniques, our gear stays safe and dry during any adventure! Additionally, using a dry bag made from durable materials will enhance its performance and longevity.
Recommended Products
WILDPROOF DESIGN: Waterproof and dustproof to keep the gear inside protected from unwanted wilderness
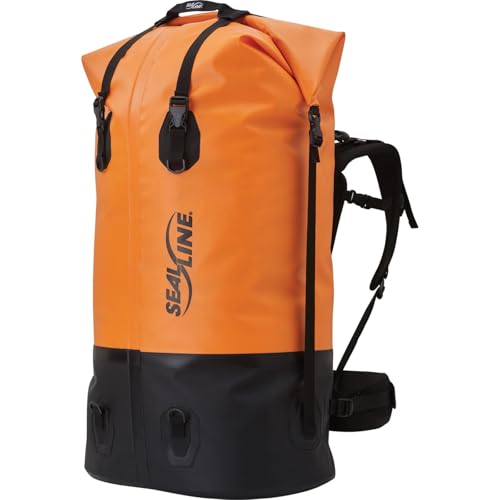
Fully-adjustable waterproof gear bag ideal for long portages and adventure travel

Fully-adjustable waterproof gear bag ideal for long portages and adventure travel
Testing the Waterproof Seal Before Use
Testing the waterproof seal on our dry bag is an essential step before any outdoor adventure. We don’t want to risk soggy gear, right? First, let’s do some waterproof testing. Grab a spray bottle, soak the bag, and see if water beads up and rolls off. If not, we might need to reproof it!
Next, try the reliable paper towel method—you’ll place towels inside, seal the bag, and spray it down. If they’re dry, we’ve got good seal integrity. Now, for the ultimate test, fully submerge the bag in water for about 30 minutes. If there’s moisture inside, we’ve got to fix or replace it. A well-tested bag keeps our gear dry, which makes our adventure so much more enjoyable!
Attaching Dry Bags to Backpacks for Convenience
Attaching dry bags to our backpacks can make our adventures smoother and more organized. We can use gear loops and attachment points already on our packs for easy external placement. Quick-release buckles or carabiners are excellent attachment methods, allowing us to secure and remove bags swiftly.
To keep our load balanced, we’ll want to attach heavier bags close to the frame. If we have multiple bags, let’s secure them together to avoid a game of “did I just lose my gear?”
Remember to use lightweight straps that won’t damage our bags but can also hold up to the outdoor wear and tear. With a little planning, we’ll enjoy both convenience and security on our journeys! Happy adventuring!
Recommended Products

Level Up Your Golf Game: Get ready for the ultimate golfing experience with Ghost Golf Anyday Bag featuring a lightweight design that weighs just 6.5lbs. Designed for golfers who prefer a sleek and symmetrical design, our 14-way divider golf bag offers easy access and optimal protection for each club without unnecessary bulk. Customize your bag with our removable ball pocket panel! Color: Valor.
SPACIOUS LAY-FLAT COMFORT: XL size 80″ x 30″ design offers 6 inches more width and 2 inches more length than the Standard, giving tall campers room to truly stretch out. The hammock stays level and firm, so even at 6’5″ you can sleep on your side or stomach without feeling confined. It’s the same beloved flat-hammock comfort, now super-sized.

Massive 85 Cu Ft Capacity: The TruckDuffle expands to cab height to maximize usable truck bed volume. Designed to haul everything from luggage, coolers, and camping gear to work equipment and bulky loads, it securely contains cargo and removes in minutes so you can quickly return your truck bed to open use.
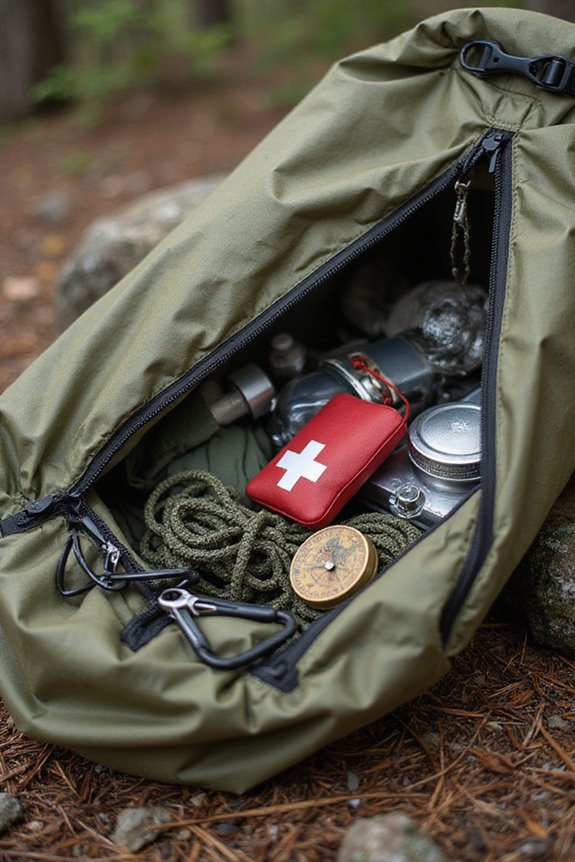
Additional Uses for Dry Bags Beyond Backpacking
When we think about dry bags, our minds often leap to backpacking and outdoor adventures. But they’re packed with potential beyond hiking trails! For instance, they’re perfect for cable organization. We can keep our chargers and gadgets safe from moisture and dust while reducing tangles. Need an emergency pillow? Just fill a dry bag with soft clothes or air—voilà! It’s a comfy solution for those long waits on the road or camping trips.
And let’s not forget their role in food storage: keep your snacks dry and your catch fresh! Whether we’re camping, fishing, or just enjoying a day outside, dry bags are our unsung heroes. Let’s get creative with them; the possibilities are endless!
Maintenance Tips for Longevity and Performance
To keep our dry bags performing at their best, it’s crucial we give them a little TLC. First, let’s remember to clean our bags after each use. A bit of warm water and mild soap goes a long way—just avoid those harsh detergents! After washing, we should air dry them completely to prevent mildew.
When storing, keep them unrolled in a cool, dry place to maintain flexibility and enhance visibility. Before we head out, let’s check for any damage or wear. Trust us, a simple pre-use check can save us from soggy surprises. Regular inspections and proper sealing techniques will guarantee our dry bags stick around for the long haul. Happy adventuring!
Frequently Asked Questions
Can I Use a Dry Bag as a Daypack?
Absolutely, we can use a dry bag as a daypack! Their versatility makes them great alternatives, especially for short trips. Just remember they may not be as comfortable or organized as traditional daypacks.
How Can I Clean and Maintain My Dry Bag?
We’ve found that the best cleaning techniques for our dry bags involve gentle soap and air drying. By nurturing them this way, we really enhance their longevity while keeping our adventures worry-free and enjoyable.
Are Dry Bags Suitable for Air Travel?
Yes, dry bags are great for air travel! With careful attention to their features and travel restrictions, we can guarantee our belongings stay protected and compliant, making our journeys smoother and more enjoyable together.
Can I Fit a Hydration Bladder in a Dry Bag?
Absolutely, we can fit a hydration bladder snugly inside a dry bag. By ensuring gear compatibility, our hydration options stay protected like treasure beneath the waves, safe from leaks and ready for adventure together.
How Do I Know Which Size Dry Bag to Choose?
When choosing dry bag sizes, we should assess our gear’s volume and purpose. For capacity comparison, smaller bags organize essentials, while larger ones suit longer trips. Let’s find what meets our adventures perfectly!