As an Amazon Associate, we earn from qualifying purchases. Some links on this site are affiliate links at no extra cost to you. Our recommendations are based on thorough research and editorial judgment.
How To Set Up A Tarp A Frame?
Setting up a tarp A-frame shelter is easy and keeps us dry. First, we’ll need a tarp, trekking poles, and some sturdy cordage. We’ll start by securing a ridgeline between two trees, then attach the tarp to it. Stake down one side of the tarp for the back wall, using poles for the peak. Finally, tension all lines to guarantee stability. Don’t forget to secure all corners! Want more tips on staying dry and cozy?
Key Takeaways
- Select a suitable tarp size and ensure it extends 0.5 meters beyond your sleeping area for optimal coverage and protection.
- Choose two sturdy trees or use trekking poles as supports to establish your tarp’s ridgeline.
- Utilize a Bowline knot to create fixed loops for securing tarp corners tightly to your supports.
- Stake down one side of the tarp to form the back wall and elevate the opposite side with trekking poles for the apex.
- Regularly check and adjust tension on all guylines to maintain tarp stability and prevent sagging during use.
Materials and Preparation
When we’re ready to set up an A-frame tarp, gathering the right materials is essential to guarantee everything goes smoothly. First, let’s talk tarp materials. We have options like coated nylon, silnylon, and that fancy Cuben Fiber—it’s lightweight and durable! Next, we’ll need some supports like trekking poles or sticks. Don’t forget durable cordage, such as 550 Paracord, for securing everything to anchor points—trees work great! Oh, and stakes and fasteners will keep our tarp taut and tight. Additionally, choosing a tarp with reinforced tie points can enhance stability during adverse weather conditions. While we’re at it, let’s add a bug net, just in case those pesky critters decide to join our adventure. With these supplies in hand, our setup preparation will be stress-free, allowing us to enjoy our outdoor retreat.
Choosing the Right Tarp Size
After gathering our supplies, it’s time to zero in on choosing the right tarp size. First, let’s consider our group size. For solo trips, a small tarp (6′ x 8′ or 8′ x 10′) offers excellent coverage balance, while medium tarps (10′ x 10′ or 10′ x 20′) fit smaller tents and provide space for gear. Larger tarps (12′ x 16′ or 16′ x 20′) shine in communal areas but can weigh us down.
Think about special areas too. A tarp should extend beyond the sleeping area—about 0.5 meters longer and wider. Also, consider the waterproof ratings of the tarp, as higher ratings ensure better protection against heavy rain. And remember, weight considerations matter in our packs, especially for longer hikes. Selecting the right tarp dimensions will keep us dry and cozy, whether we’re camping solo or with friends!
Recommended Products

7 MIL THICK BLUE TARP - Get the most out of this 7 mil water proof tarp, lightweight and versatile for a variety of practical uses around the home, jobsite, or campsite. Ideal for residential, recreational, and light commercial needs - both indoors and outdoors.

MADE IN THE USA-- Polyester Blend Canvas Weighing 14.5 Ounces per Square Foot

MATERIAL: canvas, it provides you with the greatest value because of its performances of rip resistance & Abrasion resistance, resistance, heat insulation, anti-aging, easy to fold
Selecting Suitable Cordage
Selecting the right cordage for our tarp setup can make all the difference—trust me on this. First, we should look for lightweight cords with solid tensile strength. A great choice is the 1.5-mm Kelty Triptease LightLine, as it balances weight and usability and glows at night.
For added durability and tension stability, we can consider 550 paracord or a thicker 4mm accessory cord. Thicker cords also help with knot handling, ensuring our supports stay secure. Additionally, considering options like Type III paracord can enhance our tarp setup with improved strength and versatility.
Recommended Products

LOW STRETCH, RELIABLE HOLD: Twisted polyester rope is designed for applications where you want a strong, dependable line with less give. Great for tie-downs, dock lines, tarp securing, and other jobs where a low-stretch hold matters.

All-Purpose Sisal Twine Rope - When you are looking for a natural twine rope or sisal twine that offers maximum flexibility and superior strength, you need our natural fiber sisal. It's stronger and lasts longer than jute rope or jute twine. Its resistance to water makes it an ideal nautical rope. Perfect as twine for crafts, rope for DIY, outdoor twine for gardening, clothesline rope or any heavy duty indoor or outdoor application.

3 STRAND POLYPROPYLENE ROPE - Choose the ultimate in strength and versatility with Xpose Safety 3 strand poly-combo rope. This white all purpose rope is available in a 3/8" and 5/8" thickness and 600' or 1200' length to meet all home, commercial and industrial project needs.
Identifying Anchor Points
Once we’ve got our cordage sorted out, it’s time to tackle anchor points. First, let’s look for sturdy natural anchor selection. Mature trees, large rocks, and even exposed roots work wonders. We should avoid dead wood—it could end up being a shocking surprise! Next, we need to perform an anchor point evaluation. Confirm your chosen points can withstand tension without snapping.
We’ll want to space our anchors efficiently, considering terrain and wind direction. And remember, creature comforts matter! Verify there’s enough clearance for our cordage to work smoothly without getting in the way. Additionally, having reliable survival gear is essential for ensuring you’re prepared for the unexpected. By taking these steps, we’re setting ourselves up for a safe and sturdy A-frame tarp shelter!
Recommended Products

Built to Last: Heavy-duty galvanized Steel Frame. Engineered with military-grade 2"x2"(Other companies1.5x1.5"))powder-coated steel beams—3X thicker than standard carports (1.7mm/15ga vs. 0.8mm), surpassing others in metal strength and hardness. Rust-proof for 10+ years in coastal/high-snow areas

2x2" Galvanized Steel Poles (vs. standard 1.2x1.2") with 1.7mm/15-Gauge Walls – 70% thicker than typical 1mm/25-Gauge poles, surpassing others in metal strength and hardness

[STURDY & PRACTICAL] This dog kennel will accommodate both you and your furry friend. Featured with a dual swivel feeding locking door, 2 bowl holders and stainless steel bowls, you can feed your pet without opening the kennel door. The kennel's small raised feet provide extra sturdiness, you can insert them into the ground or use stakes and anchors (not included) for added stability.
Understanding Essential Knots
When it comes to setting up our A-frame tarp, mastering a handful of essential knots can make all the difference—trust us, it’s true! Let’s explore some knot types that are crucial for our tarp setup.
The Bowline knot creates a fixed loop, perfect for securing tarp corners and is a breeze to untie afterward. The Trucker’s Hitch helps us adjust tension for those windy days.
Don’t forget the Adjustable Guyline Hitch, which allows us to tweak tension without untying—very handy! We can also use Larks Head and Clove Hitch knots for quick attachments. Mastering knot tying means reliable stability—no one wants a tarp flapping in the wind! With these knots, our shelter becomes more secure and easier to manage. Additionally, understanding the importance of weather resistance in tarp materials ensures our setup can withstand various outdoor conditions.
Setting Up the Ridgeline
Setting up the ridgeline is a critical step in guaranteeing our tarp provides maximum coverage and stability. We’ll want to start by selecting a strong cord, like paracord, that can handle outdoor conditions. Next, let’s choose two sturdy trees about the length of our tarp apart. We need to ascertain they’re healthy and evenly spaced, which will help minimize sag.
Now, when we tie the cord to these anchor points, using adjustable knots like the taut-line hitch allows us to tweak the ridgeline tension later. It’s essential the ridgeline stays taut enough to prevent sagging but not so tight that it risks snapping the anchor points. Regularly check that tension throughout our tarp’s use; trust me, we don’t want any surprises! Additionally, having a first aid kit on hand while setting up your tarp can ensure safety in case of any minor injuries during the process.
Attaching the Tarp to the Ridgeline
Attaching the tarp to the ridgeline is where the magic really happens. We’ll use some easy tarp attachment techniques to guarantee a sturdy setup. First, grab a short length of cord—around eight inches works wonders. Tie a slipped overhand knot to create a loop on the tarp’s tie-out. Lay it over the ridgeline, and secure it with a taut line hitch; this way, we can adjust it without retying. Remember, the taut line hitch lets us easily tighten or loosen things as needed. If we’re feeling extra fancy, consider using Dutch Hooks or Tarp Flyz for a smooth glide. With these simple knot types, we’re on our way to a secure and cozy shelter!
Staking Down the Tarp Corners
As we plunge into staking down the tarp corners, it might be tempting to think it’s a straightforward task, but there’s a bit more finesse involved. First, we need sturdy tent stakes—no flimsy ones here, please—and guy lines to fit the tarp materials we chose.
Let’s position the corners at about 45-degree angles from the ridgeline. This helps distribute tension evenly. Remember, we’re pulling the corners outward rather than straight down to keep everything nice and taut without overstretching.
Don’t forget to stake far enough out to maximize tension. A solid tension technique eliminates flapping and sagging, giving us that cozy, steady shelter we crave. With a little practice, we can make it firm and secure—worth every effort!
Recommended Products

✅HEAVY DUTY OUTDOOR VENUE: Create a memorable setting for your event with our spacious 32’x20’ PVC party tent. The frame is built with sturdy 1.5 inches (38mm) galvanized steel tubes, featuring a diameter of 1.65 inches (42mm) for the metal connectors. Also included are 4 super stakes for added stability. This ensures reliable support and resilience for your outdoor events.
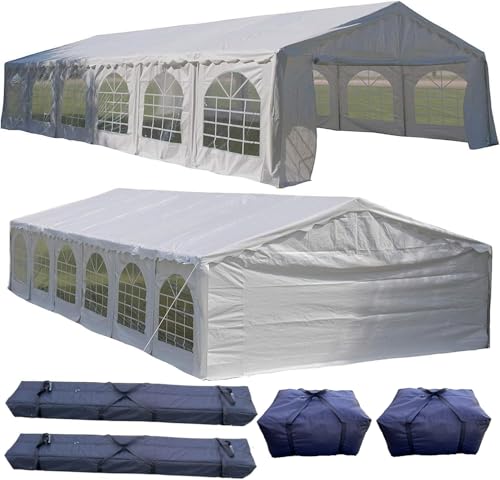
✅DURABLE STEEL FRAME: Our tent boasts a robust steel frame for lasting durability. The frame is built with a sturdy 1.5 inches (38mm) galvanized steel tube, featuring a diameter of 1.66 inches (42mm) for the metal connector. Also, included are 4 super stakes for added stability. This ensures reliable support and resilience for your outdoor events.

Removable Roll-Up Dual-Zipper Doors: Coming with removable sidewalls and door,The material of the car canopy is 200g PE fabric, waterproof, UV resistant, sturdy and durable.The door is equipped with double zippers and buckles, can be fully removed or rolled up, and designed as a front and rear door, you get convenient entry and exit, better visibility
Using Guy Lines for Stability
Now that we’ve staked down the corners, we’re ready to tackle one of the most important techniques for making our tarp stable—using guy lines. These lines keep the tarp from sagging and help it resist wind forces. By anchoring at a 45-degree angle with durable, low-stretch cordage, we maximize stability.
For knot techniques, we can start with a bowline for securing to loops and try a taut-line hitch for easier tension adjustments. Remember, proper anchor strategies are key—trees or solid stakes work great! Plus, reflective lines will help us avoid tripping in the dark. By following these steps, we can guarantee our shelter’s reliable and ready for any weather that comes our way!
Recommended Products
PROFESSIONAL GRADE - Steel Tarps from US Cargo Control are made with high-quality, professional-grade materials and designed to protect your cargo from the harsh conditions (weather, road debris, etc.) you might encounter on the road.
PROFESSIONAL GRADE - Heavy Duty Truck Tarps from US Cargo Control are made with high-quality, professional-grade materials and designed to protect your cargo from the harsh conditions (weather, road debris, etc.) you might encounter on the road.

Notch’s Dyneema throwline is made from high modulus fiber that offers incredibly high strength in a lightweight package
Adjusting Tarp Tension
Adjusting tarp tension is essential for keeping our shelter secure and functional in any weather. We need to use some effective tarp tensioning techniques for this! First, we can utilize mechanical tension devices, like washers and pulleys, to lock in our tarp’s tension. To loosen it, just release the top locking washer—and voilà, instant slack!
For fine adjustments, let’s try the Trucker’s Hitch knot, which gives us mechanical advantage (a fancy way of saying it makes tightening easier!) Don’t forget about slide-and-grip knots like Klemheist, too—they let us adjust without untying! Regularly checking our tension is key to avoiding future drama with wear and tear. With practice, we’ll master these tension adjustment practices and enjoy a snug, weather-ready shelter!
Anchoring With Poles or Trees
How can we securely anchor our tarp when we’re out in the wilderness? First, we can use two sturdy poles or trees to shape our tarp. If we’re using poles, let’s insert them through the tarp’s ridgeline tie-outs, adjusting for our desired pole height. Next, we can run guy lines from the poles’ tops to stakes on the ground, ensuring our tarp maintains its tight orientation.
If trees are handy, we can string a paracord tightly between them about three feet high. We’ll hang the tarp over this line, using the center tie-outs. Don’t forget to stake down the corners, so our tarp stands strong, like our enthusiasm! A solid anchor is key to keeping us cozy and leak-free.
Creating a Closed-End A-Frame
Ever wondered how we can quickly create a cozy closed-end A-frame shelter? First, we’ll stake down one side of the tarp. This forms our back wall. Next, we’ll use trekking poles to create the frame apex by inserting them through the ridgeline tie-outs. Then, let’s fold the longer tarp side inward at one end to form the closed end. Secure those edges with stakes, keeping the gaps tight for better wind and rain protection.
Now, tension all guylines and stake down the corners for stability. This closed end will keep the heat in and make our little haven cozier! Don’t forget, we can customize this to suit our needs, whether we want one or both ends closed. Happy camping!
Additional Tips for Weather Protection
When it comes to weather protection, we need to be proactive to guarantee our tarp setup is resilient against the elements. To enhance wind protection, let’s pitch the tarp steeply in an A-frame, shedding moisture effectively. Facing the opening away from the wind can also help keep us cozy and dry.
Using durable ropes and bows or trucker’s hitch knots to secure everything tightly is essential. Double layering our tarps is another fantastic waterproofing technique, improving resistance to those surprise rain showers. We should also elevate our tarp’s ridgeline to allow for ventilation. Remember, a little planning goes a long way in keeping our space safe and sound—nobody wants a surprise rain shower ruining our campfire stories!
Maintenance and Adjustments During Use
Maintaining our tarp setup during use is essential to guarantee it stays effective and lasts for many adventures. Regular tarp maintenance helps prevent issues. Let’s keep an eye out for slack in the ratchet straps; tightness is key to avoid sagging. We need to check the grommets and frame bolts, ensuring everything’s stable.
For those tension adjustments, we should regularly inspect and tweak the tautness. A little adjustment can make a big difference. When we clean the tarp, mild soap works best—save the harsh stuff for the kitchen! By being proactive, we can extend our tarp’s life and keep it ready for our next outing. Remember, a well-loved tarp is a trusted companion on our adventures!
Frequently Asked Questions
What Should I Do if It Rains While I’M Under the Tarp?
Oh joy, rain’s our uninvited friend! Let’s adjust the tarp for proper drainage and tighten those lines. With a little rainproofing magic, we’ll stay dry—and maybe even enjoy a cozy moment together under here!
How Do I Choose the Right Location for Setting up the Tarp?
When choosing a tarp location, let’s look for flat ground features, avoiding rocks and debris. A well-drained site near natural windbreaks enhances comfort and protection, ensuring our shelter feels safe and cozy together.
Can I Use a Tarp for Backpacking or Hiking Trips?
Absolutely, using a tarp for our backpacking trips feels like harnessing a cloud’s embrace. With tarp benefits like lightweight shelter and easy setup, it’s a must-have among our backpacking essentials. Let’s explore the adventure together!
How Long Does It Typically Take to Set up a Tarp Shelter?
Typically, tarp setup time varies; experienced users can set up a simple shelter in under ten minutes, while novices might take longer. We’ve found that practicing knots greatly enhances our tarp shelter efficiency and overall experience.
What Are Common Mistakes to Avoid When Setting up a Tarp?
When setting up a tarp, let’s avoid common mistakes like poor tarp tension and incorrect angles. Ensuring stability and proper pitch keeps us dry and safe, making our outdoor experience that much more enjoyable together.