As an Amazon Associate, we earn from qualifying purchases. Some links on this site are affiliate links at no extra cost to you. Our recommendations are based on thorough research and editorial judgment.

How To Test A 24 Hour Kit?
To test a 24-hour kit, first gather essential supplies like water, food, and first aid items. We’ll want to avoid heavy meals or strenuous activities during testing. Start by collecting our urine in sterile containers after emptying our bladder at the beginning of the 24 hours—don’t forget to label! Keep it cool and transport it to the lab within three hours. Trust us, staying organized makes this whole process easier. Curious about more tips on what to include?
Key Takeaways
- Designate a full day to test your 24-hour kit at home, avoiding strenuous activities or major meals.
- Collect relevant items like food, water, and first aid supplies, ensuring they meet your family’s unique needs.
- Check the contents of your kit for proper organization and portability, using a distinct colored pack for easy identification.
- Use sterile containers for collecting any required samples, ensuring cleanliness to prevent contamination during testing.
- Review the functionality of tools, signaling devices, and other equipment to ensure they are operational and effective in emergencies.
Understanding the Purpose of a 24 Hour Kit
When disaster strikes, it’s easy to feel overwhelmed—especially if we don’t have the right supplies at our fingertips. That’s where a 24-hour kit comes in. It serves an emergency significance by helping us meet our basic needs in those critical first hours after a crisis. We’ll want to pack enough water, food, and first aid supplies to keep ourselves safe and sound. Customization makes these kits even more special. We can include baby items, pet food, or anything necessary for our unique family. Plus, we should keep our kits portable and easily accessible, so we’re ready for swift action. After all, being prepared is a lot more comforting than scrambling to find essentials in a panic! Including survival essentials like emergency tools and food supplies can further enhance our readiness for unpredictable situations.
Preparing for the Test
Now that we grasp what a 24-hour kit is meant for, let’s get ready to put it to the test. First, let’s pick a day when we’ll be home for the full 24 hours. We want to steer clear of strenuous activities or major dinners that could mess with our results. Before the test, we must focus on sample preparation by gathering the right sterile containers and washing any reusable ones thoroughly. Next, practice good hygiene—always start with an empty bladder, discarding the first void but keeping track of the time. Remember, we need to keep everything clean to avoid contamination! With a little organization, we’re on our way to a successful testing experience. Additionally, ensure that we have all necessary first aid supplies on hand for any minor injuries that may occur during the test.
Collecting the Required Materials
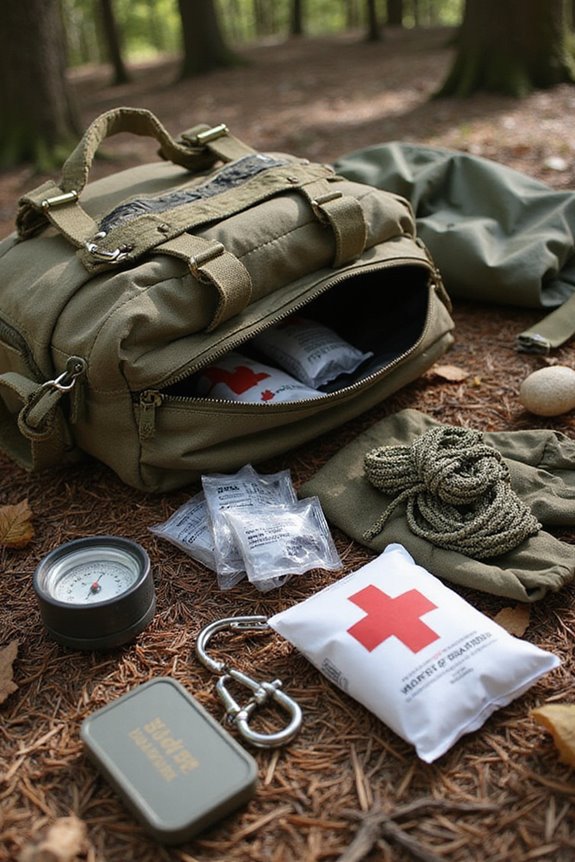
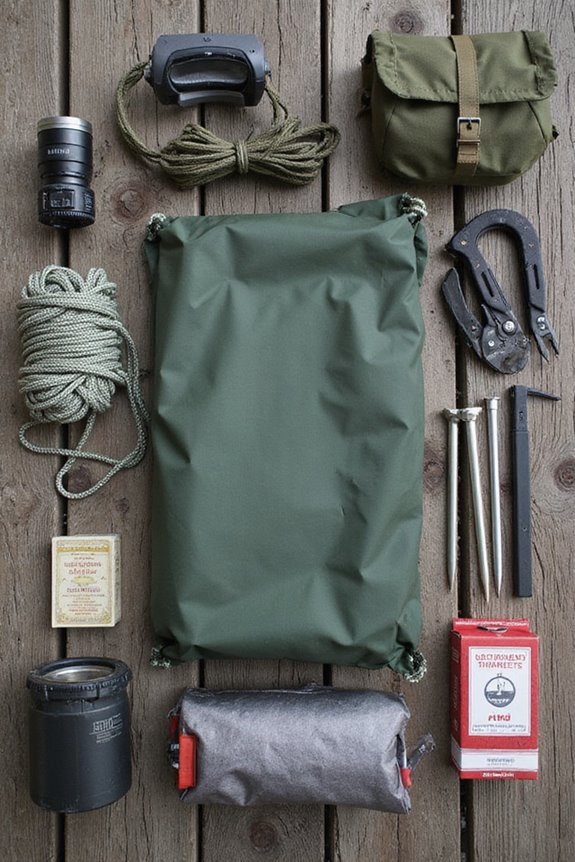
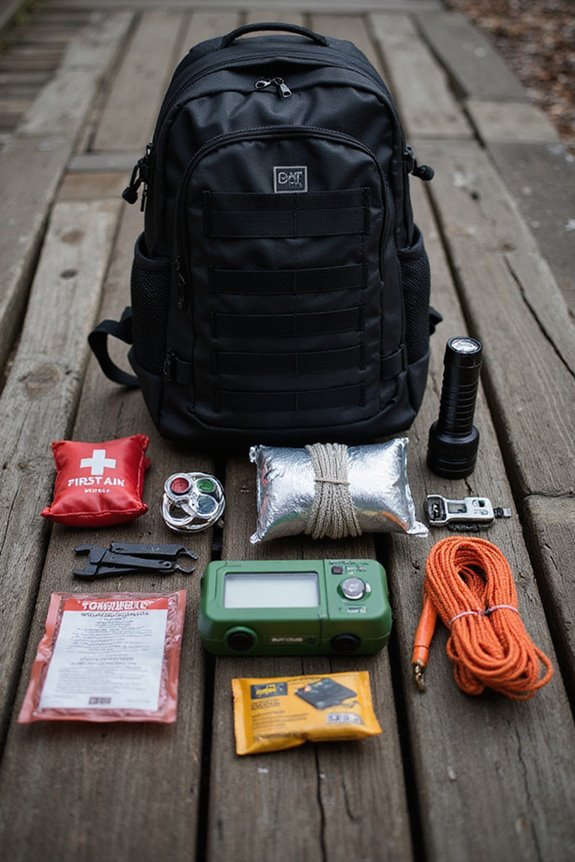
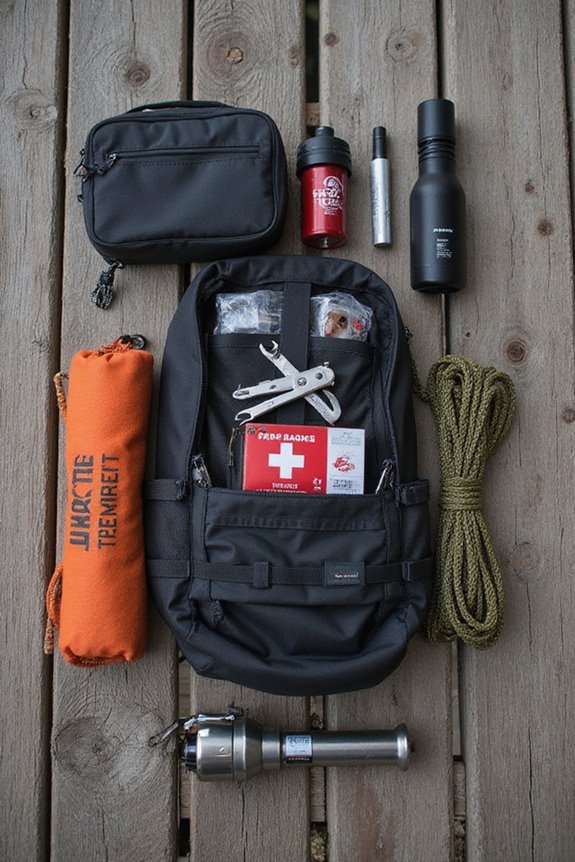
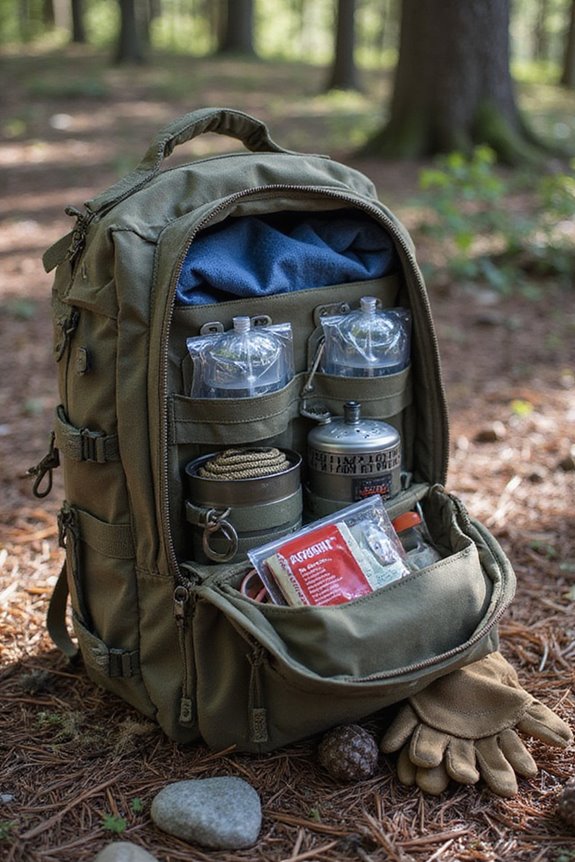
How do we guarantee we have everything needed for our 24-hour kit test? First, let’s focus on material selection. We’re looking at clothing, tools, emergency sustenance, and comfort items. Start with a complete uniform like ABU or BDU, and don’t forget our identification cards—it’s key to know who we are! Next, grab a red or orange 24-hour pack; it’ll keep us organized.
For tools, a multi-tool or pocket knife is essential. We’ll need a signal mirror and whistle, too. When it comes to food and hygiene, we’ll want non-perishable supplies and personal items. Additionally, consider including long shelf life items in your kit to ensure sustenance is available when needed. Let’s customize our kit based on our needs and include quirky essentials—we’ll be the most prepared team around!
Dietary and Fluid Restrictions
Dietary and fluid restrictions can make a big difference when testing our 24-hour kit. To guarantee accurate results, let’s be mindful of our dietary limitations. First, we need to avoid certain foods like bananas, tomatoes, and citrus fruits for a few days. These can mess with test outcomes, so let’s steer clear!
Next, our fluid intake is essential. While we should hydrate, we must skip caffeinated and alcoholic beverages during the collection. Also, avoiding strenuous activities and emotional stress helps keep our results true to life. So, let’s take it easy—no mad dashes to the gym! By being careful with what we eat and drink, we’re setting ourselves up for accurate results we can trust. Additionally, consider the importance of long-shelf-life food items during your test, as these supplies are crucial for ensuring proper nutrition in emergency kits.
Instructions for Collection Timing

1. Collecting our urine sample accurately is essential, so let’s focus on some collection timing tips. We’ll kick off in the morning! Start by emptying your bladder at the exact start time and toss that first void. Don’t forget to label your container with the start time!
Next, we’ll collect every drop for the next 24 hours, including nighttime trips. At the end, we’ll add that final urination at the same time we began.
Keep an eye out for any timing discrepancies; if we miss overnight collections, we need to restart. Remember to store our container cool, and use collection aids to avoid spills. Having a well-organized emergency kit can support your overall preparedness just like accuracy in our sample collection. We’ve got this—accuracy is everything!
Beginning the Collection Process
Alright, we’re ready to kick things off with the collection process for our 24-hour urine test. First things first, we need a clean, large container specifically for this purpose. Before we start, we should label it with our information and the start time.
Now, we’ll begin by completely emptying our bladder. Yes, that means our initial urine disposal is essential—it won’t be collected! Jot down the exact date and time of this first void; it marks our official collection time. From here on out, we’ll collect every drop for the next 24 hours. Let’s keep the collection container cool and secure. Emergency kits can help ensure that you are prepared for health-related situations during this time. Remember, it’s all about accuracy. Let’s do this together!
Collecting Urine Over 24 Hours
When it comes to collecting urine over a 24-hour period, it’s crucial that we stay organized and focused. We need clean collection containers approved by our healthcare provider—no sneaking in random Tupperware! It’s essential to collect every single urine sample without exception. Remember to handle each voiding with care to avoid spills or contamination. After each sample, keep the container cool, either in the fridge or with ice packs. A common mistake is forgetting to label the large collection container with our details right at the start. So, let’s avoid that! With proper attention to our urine collection process, we can guarantee accurate results for whatever test we’re doing. Every detail counts as we navigate through this together!
Finalizing the Collection on Day 2
As we wrap up our 24-hour urine collection on Day 2, it’s vital to stay sharp and vigilant. Let’s make sure we include that significant first morning void today. Remember, timing is key! Our final voiding techniques should guarantee we’re capturing every drop right up until the collection ends.
After our last pee, let’s cap the container securely to prevent any mishaps. Storing it in a cool place keeps it safe from contamination—because nobody wants a spoiled specimen! For collection completion tips, let’s jot down the exact time of our last void to keep our records straight. Finally, let’s handle the sample with care when we submit it to the lab. We’re nearly at the finish line, and we’re doing great!
Properly Labeling the Collection Container
Now that we’ve wrapped up our 24-hour urine collection on Day 2, let’s turn our attention to properly labeling the collection container. Accurate labeling is critical for specimen tracking and avoiding confusion down the line. We need to guarantee the label includes your child’s full legal name, one unique identifier like their date of birth, and the start time of the collection.
If we’re using multiple containers, let’s label them sequentially to keep things organized. Remember, always use clear, legible writing—whether it’s preprinted or handwritten—to guarantee labeling accuracy. And if a preservative is inside the container, make sure the label warns about it! Properly labeling will help guarantee everything is processed smoothly, so let’s do it right!
Handling Special Cases for Infants
Handling special cases for infants can feel a bit overwhelming, but with the right approach, we can get through it smoothly. First, we’ll need specific tools. Using sterile, infant-specific urine collection kits like U-Bag® guarantees proper fit and minimizes contamination. Next, let’s prepare baby properly by washing the genital area—this is essential for contamination prevention.
During the collection, we should monitor closely, replacing soiled pads every 10 minutes to keep it all fresh. Oh, and let’s avoid any creams or powders before we start; they could mess with the sample. By handling these infant considerations carefully, we can capture reliable samples and keep our little ones comfortable. Remember, a calm environment helps everyone!
Storage and Preservation of the Sample
When it comes to ensuring the integrity of our urine samples, proper storage and preservation are key. We need to keep the samples refrigerated between 2°C and 8°C to support accurate testing results. Using a cooler with ice packs throughout the collection period helps with sample refrigeration, so let’s make that a priority.
While most 24-hour urine collections don’t require preservatives if we’re chilling them right, some tests might need special handling. If we’re using corrosive preservatives like acetic acid, it’s essential to handle them carefully. You wouldn’t want any mishaps! Always check lab instructions before we start, making sure our sample is ready for accurate analysis. Safe storage today means reliable results tomorrow!
Maintaining Sample Integrity During Collection
Proper collection of urine samples is just as important as storage, and we need to pay close attention to how we gather them. First, let’s use only chemically clean, lab-provided containers—no makeshift jars allowed! We’ll start our 24-hour collection after tossing the first morning void to guarantee accuracy.
To preserve sample integrity, keep contaminants at bay. Avoid mixing urine with fecal matter and collect in a clean, clutter-free environment. Remember, touching the container’s mouth to the faucet can cause sample contamination too.
Don’t forget to label our specimen clearly. Accurate details can save us from headaches later. Following these simple steps can help us maintain sample integrity and guarantee that our results are reliable. Let’s get it right!
Procedures After Collection
After collecting our 24-hour urine sample, we’ve got a few key steps to follow to confirm everything stays on track. First, let’s make certain we’ve got labeling accuracy. We need to label our container with our full name, and the exact start and end dates and times. Next, it’s time for storage. Keeping our sample cool is vital—refrigerating it is best, unless we’re using a cooler with ice. We want to avoid any contamination, so let’s make sure the sample stays safe from spills or unwanted additions. Finally, we should transport it to the lab as soon as possible. It’s like making sure our favorite cake doesn’t go stale; the sooner, the better!
Transporting the Sample to the Laboratory
Transporting our 24-hour urine sample to the lab is crucial, as timing and transport temperature can really make or break the test results. We need to keep the sample chilled, ideally between 2°C and 8°C (35.6°F to 46.4°F). Using portable coolers with ice packs is a good idea to prevent sample contamination. Let’s avoid freezing it, as that can change the results unexpectedly.
We’ll want to get the sample to the lab as soon as we can—preferably within three hours. Labeling our container with the start and end times guarantees everything’s clear. And remember, keeping it secure in a leak-proof container helps avoid any mishaps. Let’s take these steps seriously; our health deserves it!
Importance of Adhering to Protocols for Accurate Results
When we think about the accuracy of our 24-hour urine test results, it’s clear that sticking to the protocols is crucial. If we don’t adhere to these straightforward guidelines, we risk our testing accuracy and might even need to start over.
We should always begin by emptying our bladders in the morning and marking that time as the start. Collect every drop, even the first one the next morning. Make certain we use the correct container—no mixing things up!
Keeping our sample cool in the fridge is just as important, as is staying hydrated throughout the day. By following these steps, we not only enhance our protocol adherence but also guarantee reliable results, giving us the answers we need with confidence.
Frequently Asked Questions
How Can I Ensure Accurate Timing for 24-Hour Urine Collection?
To guarantee timing accuracy during our 24-hour urine collection, let’s follow proper collection techniques. We’ll start after the first urination, accurately record times, and avoid interruptions for ideal results. Together, we’re set up for success!
What Should I Do if I Miss a Urine Collection?
If we miss a urine collection, let’s not add any outside samples. Instead, we should restart the entire process. It might be necessary to discuss alternative tests with our healthcare provider for accurate results.
Can Medications Affect the Results of the 24-Hour Test?
Yes, medications can definitely impact our test results, affecting testing reliability. We’ve got to be mindful of medication interactions, and perhaps even pause certain drugs before collection for accurate results. Let’s communicate with our healthcare team!
Is It Necessary to Fast Before Starting the Collection?
No, we don’t need to fast before starting the collection. Fasting’s importance varies by test, but for standard 24-hour samples, we’ll focus on following collection guidelines to guarantee accurate results.
What Types of Analytes Are Commonly Assessed in 24-Hour Urine Tests?
We often assess urine composition, examining creatinine, urea nitrogen, electrolytes, and proteins. Each analyte holds significance, revealing kidney function, metabolic health, and potential concerns, guiding us toward better understanding our overall well-being together.